Configuration Docs
Since version 1.15.0 the inspectIT Ocelot configuration server provides the option to look at documentation for instrumentation objects, i.e. scopes, rules and actions, from the perspective of a selected agent mapping.
Using existing Configuration Docs
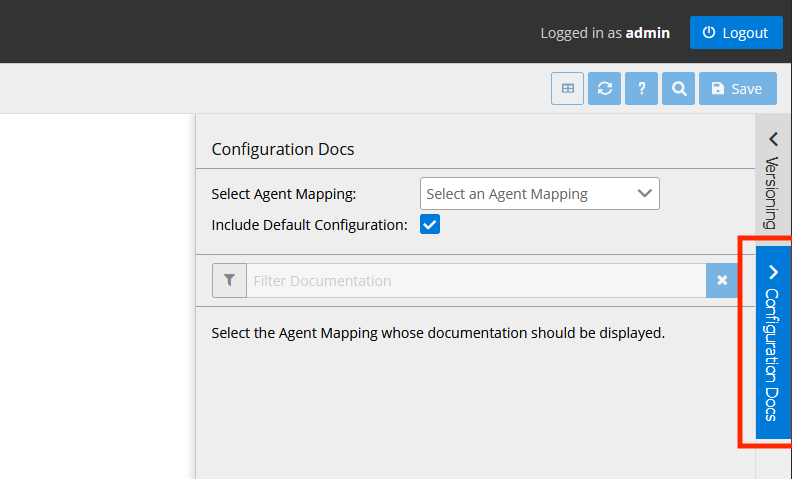
To open the sidebar for the documentation, click on the Configuration Docs-button to the right of the configuration editor.

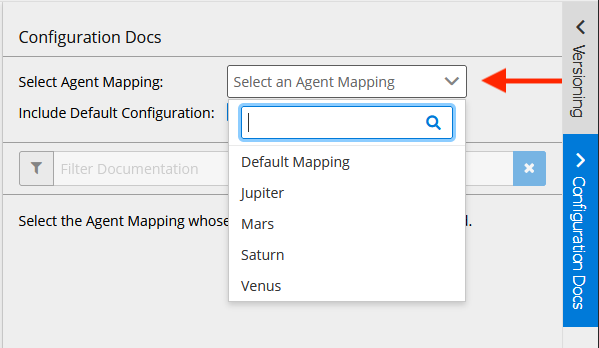
Then select an agent mapping, for which the documentation should be shown, from the Dropdown menu. They are alphabetically ordered, and can be filtered using the search box.

You can also decide if you want to include the default configuration that is shipped with the agent by default in the documentation. The checkbox below can be used to turn this on or off.
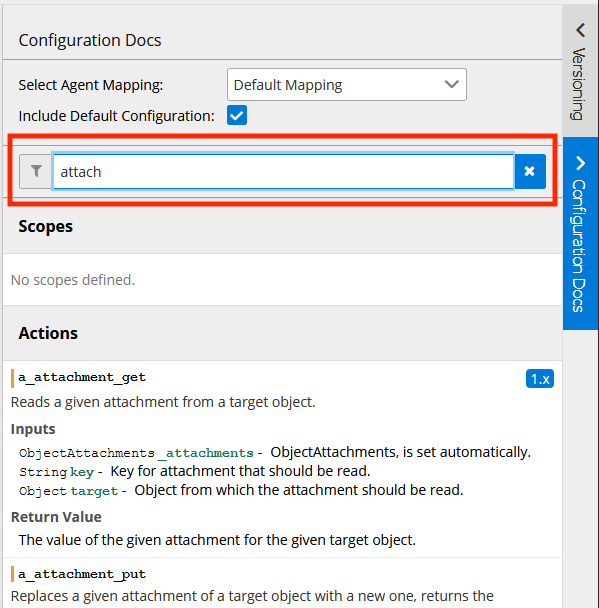
The documentation for the selected agent mapping will then be shown below. It updates whenever you change either of the settings at the top, or save changes to a configuration file in the editor.
To help with searching documentation for specific objects, you can filter the documentation using the filter text box above.

Writing your own Configuration Docs
Part of the documentation is automatically created based on the attributes of each instrumentation object, so there will be some documentation for your own configurations without additional effort. However, this is of course limited, so to make full use of the feature, you should extend them as described in the following.
tip
See also the chapter regarding Configuration Code Style for an overview of recommendations on how documentation should be structured.
Common Documentation Attributes
With all three kinds of instrumentation objects documentation is added below the key docs.
Depending on the type of the instrumentation object there are more or less documentation attributes that can be set.
For scopes and rules the following attributes are all options, for actions there a few more.
Attribute: Description
With the key description, you can provide a general description of what the instrumentation object is for, what it does or how it works.
Multiline Strings within the description will be in the actual documentation with all the linebreaks, indents, etc. that you put into them. Wrapping of lines that are too long for the documentation view will happen automatically. Therefore, you should avoid putting linebreaks within sentences, it could lead to seemingly random linebreaks in the actual documentation view. It is implemented that way, so you can use group the description into paragraphs or express something more specific, e.g. describe what an input of type Map should look like by writing an example as YAML into the description.
Attribute: Since
With the key since you can add a versioning tag as a string that will also be shown in the documentation.
Example
The documentation for a rule could then for example look like the following:
[...]
  rules:
    'r_new_rule':
      docs:
        description: |
          Captures execution time of current method.
          The capturing will only happen if xy is true.
        since: '1.42.0'
      [...]
Special Documentation Attributes for Actions
For actions there are two more possible keys below docs.
Attribute: Inputs
One is inputs below which you can add any input names as keys and a description for them as values.
For special input parameters (see Input Parameters for further info) the description is added automatically, so you do not have to add any yourself.
Attribute: Return-Value
The other is return-value which should contain a description of the return value, if there is any.
Example
An action with a full documentation could look like the following:
[...]
  actions:
    'a_attachment_get':
      docs:
        description: 'Reads a given attachment from a target object.'
        inputs:
          'target': 'Object from which the attachment should be read.'
          'key': 'Key for attachment that should be read.'
        return-value: 'The value of the wanted attachment for the given object.'
        since: '1.42.0'
      input:
        '_attachments': 'ObjectAttachments'
        'target': 'Object'
        'key': 'String'
      value: '_attachments.getAttachment(target, key)'
